In the Box!
Full Earthshaker Institute Sinking Building mechanism, ready to plug and play
Includes:
1 Institute Mechanism
1 Wiring Harness
2 #10 Washers
1 Installation Manual
Thanks for you interest in adding what your Earthshaker Pinball should have had in the first place.. An Earthshaker institute building that moves! We have tried to make a product that is as easy to install as possible without the need to hack apart you machine, yet give you all the benefits of the original moving Earthshaker building. All components used, were machined by myself, or commercially purchased. All kits include a wire harness that supplies all the inputs to the add on unit, without the need to hack apart your wire harness This area documents the projects progression since its inception in 2003. All info on this page, with the exception of the info directly below, covers the revision 1 unit that only had about 10 or so made Revision 2 was next that saw another 30 units till we landed at the final rev 3 build
Full Earthshaker Institute Sinking Building mechanism, ready to plug and play
Includes:
1 Institute Mechanism
1 Wiring Harness
2 #10 Washers
1 Installation Manual
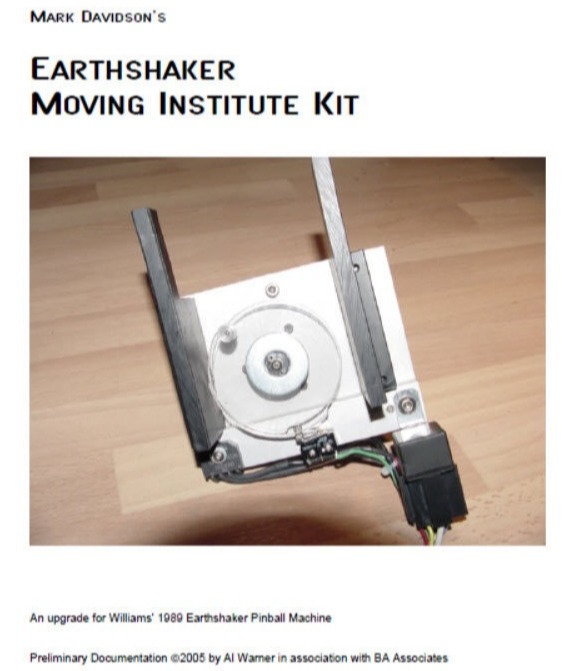
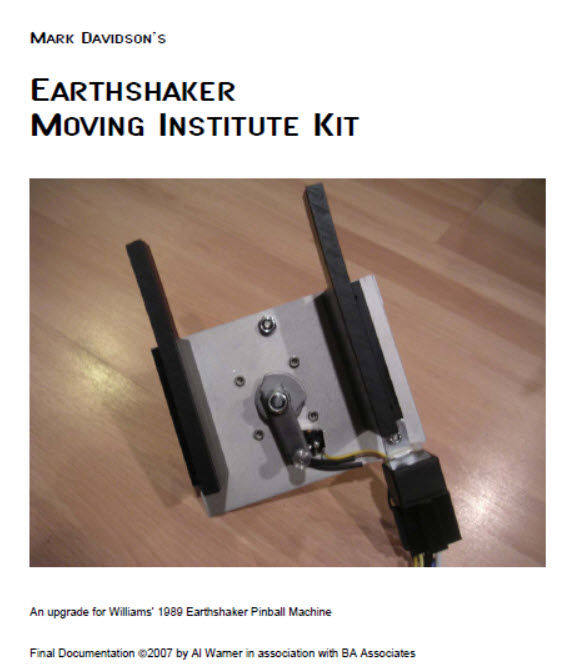
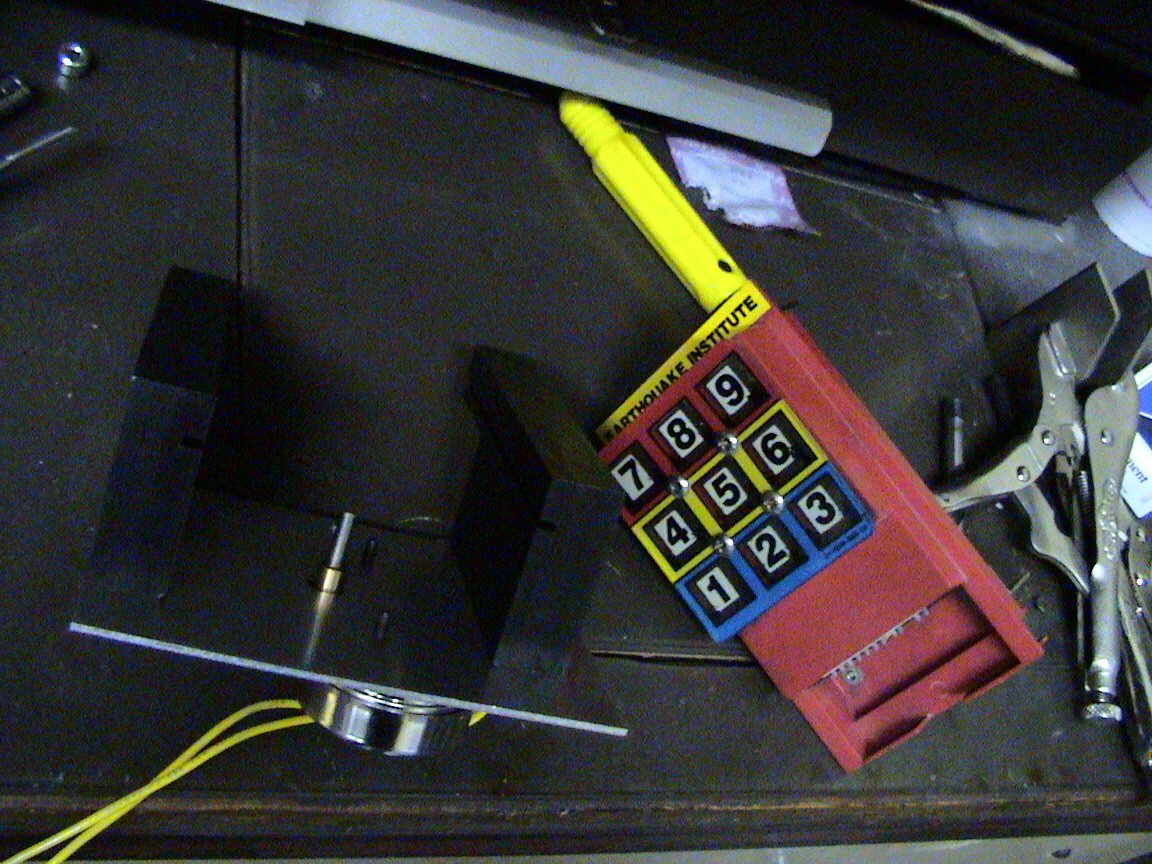
Title: An upgrade for William's 1989 Earthshaker Pinball Machine
Similar to our last project, making the Dr. Who Dalek head move for the Dr. Who pinball machine, our latest project adds life to a another playfield toy, that was omitted at the factory in production machines, most likely due to cost.
I don't know how many prototype machines were made, But the first "prototype" machines had an interesting feature where the Earthshaker Institute would sink into the playfield at certain spots in the game. Now you can have this feature back on your machine.
The following engineering pages, will document the history of this project, from beginning to end. A similar page was made for the doctor who project, and can still be found here and the most current project info is here
The first thing essential for a project like this is to obtain the proper pinball machine! I was lucky enough, to buy a production Earthshaker, and borrow a friend's prototype version that already had moving Earthshaker Institute.
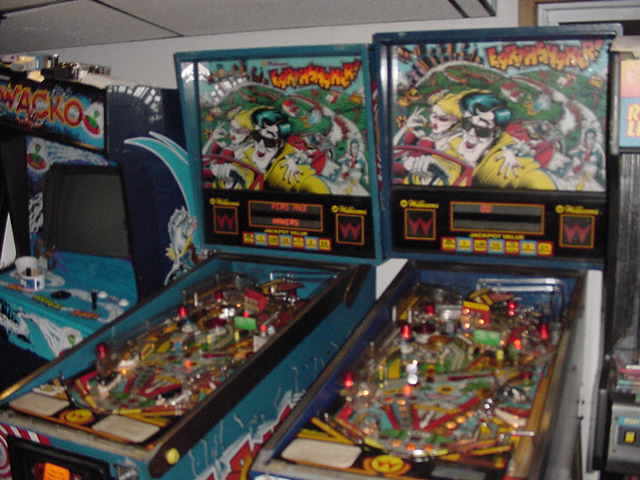
A Pair of shakers
The Basement Arcade
Upon pulling the moving prototype apart, I noted the construction consisting of one Opto board, two pillar is guiding the institute up-and-down, a roller / cam assembly and a 24 volt AC motor. the original motor spins at 12 RPMs
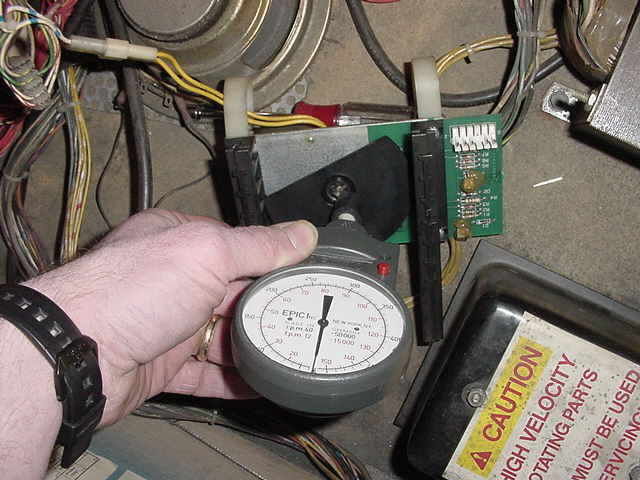
Tach
The Basement Arcade
Browsing through the catalogs to find a suitable motor was a more difficult than expected. We finally chose a 24 volt AC motor similar in shape in size to the original motor with the one exception that it turns at 8 RPM rather than 12.
The original tracks that supports the Institute, seems to have been made from either a cast resident or injection molded. Our reproduction will made out of black Delrin. The appropriate piece of Delrin was purchased and cut into the general shape of the original pillars. Similarly, aluminum was purchased to construct the mounting plate for the Delrin pillars, motor, and switches to feed back to the CPU.
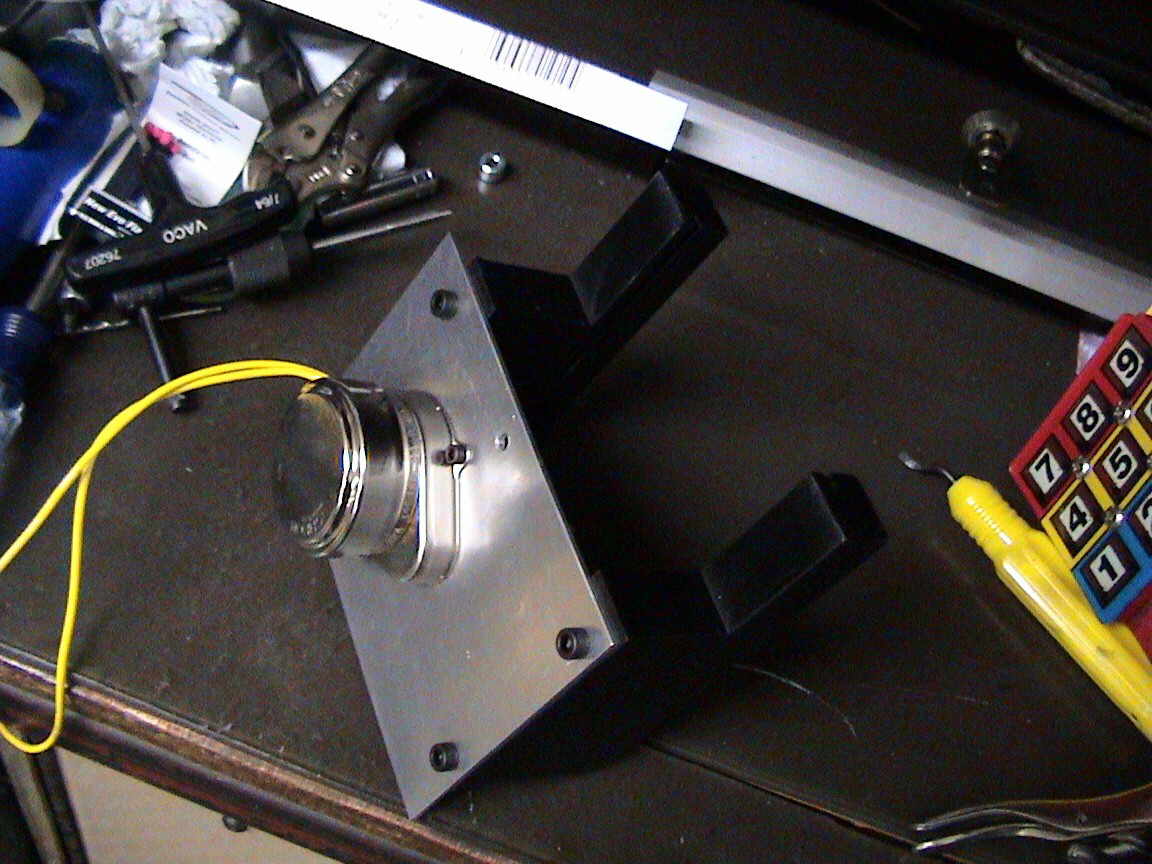
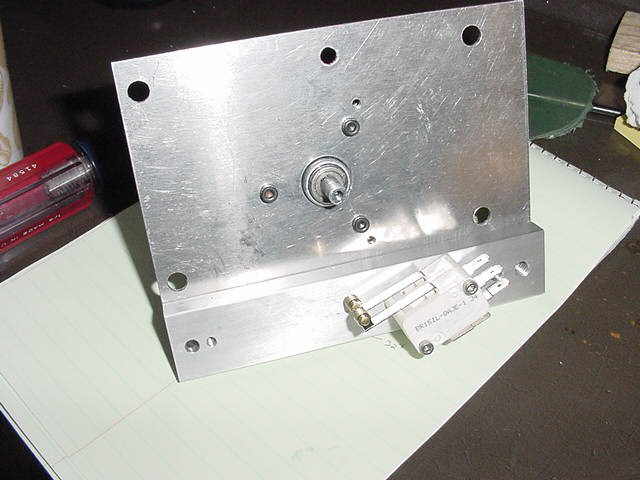
Pillars & motor mounted on alum plate
The Basement Arcade
Pillars - motor mounted on alum plate 2
The Basement Arcade

First fitting of the institute
The Basement Arcade
Although the initial fit looked good on the workbench, the thickness of the Delrin piece was too large to fit to the opening in the playfield. Also, the chosen motor's driveshaft was longer than OEM motor used by Williams. new tracks had to be cut in two to Delrin pillar, and relief cuts had to be put into the pillars as well in order to make the Institute cleared the motor shaft and the entire unit it into the OEM playfield opening.
Once this was done and the unit physically fit into the playfield, the mounting brackets and plastic shield on top of the Institute were removed as they are in the prototype unit. Cam was cut out of acrylic,end to leaf switches added to replace the opto board.
The Institute has its OEM mounting removed
The Basement Arcade

Shield must be removed!
The Basement Arcade
Reproduction Prototype running down
The Basement Arcade
Reproduction Prototype running up
The Basement Arcade
Major setback No. 1 is that the 8 RPM motor I purchased, does not have enough balls, to bring the Earthshaker Institute back the top the center.
The first thing you would think, when specifying the motor, is that if the original motor was 12 RPMs, and the replacement motor is to be 8 RPMs, that there is more gear reduction in an 8 RPM motor and the 8 RPM motor should have more torque.
Unfortunately this is not the case in my scenario. It seems that the way the motor manufacturer got the final output of 8 RPM, was too slow the actual RPMs of the main drive down, henceforth there is less reduction in my 8 RPM motor over the original 12.
Bottom line is I've ordered a new motor. The replace the motor is to be 12 RPMs, identical to the original but will run on DC rather than AC. the bad news is that the motor is five times more expensive than the motor on prototype No. 1. the other bummer is that now the AC needs to be rectified before it needs to the new motor, which also adds yet another part :-(
Well with some free time awaiting the new motor, I took the time to update drawings. Typically, projects start on cocktail napkins, make their way to graph paper then to cad.
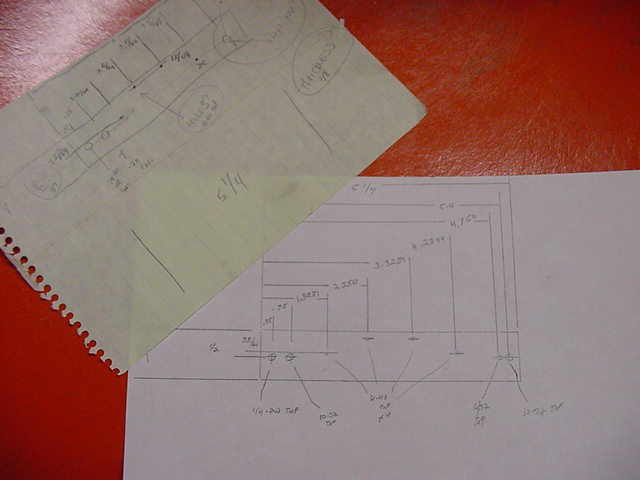
Drawing updates
The Basement Arcade
Switch bar now on CAD
The Basement Arcade
Cool! The motor came in… The mounting is different, but that was to be expected. More holes were added to our prototype motor plate. Also, the overall shaft length is very different then the original motor, so the slot rails for the building to slide in need to be moved as well
The first prototype is named ALPHA one and is the unit I typically keep for may machine, Once all the parts fit and work on one unit, we build BETA one, which is the first unit built off of the final prints to insure they are 100% accurate … But I'm getting ahead of myself here
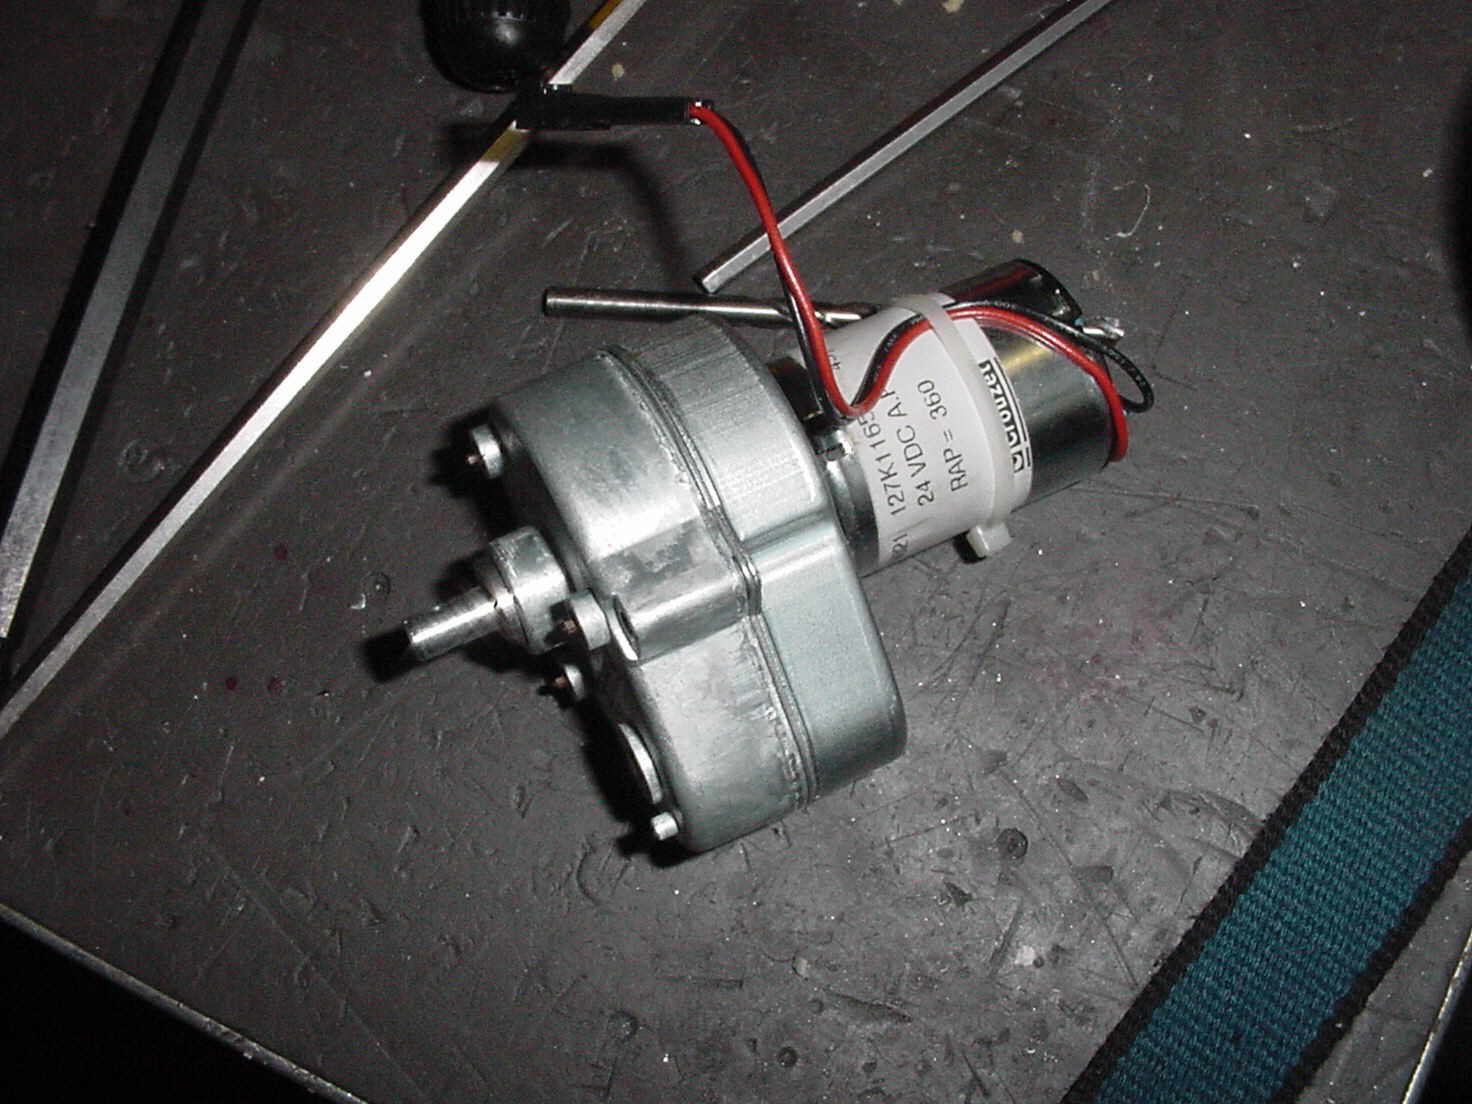
Replacement motor
The Basement Arcade
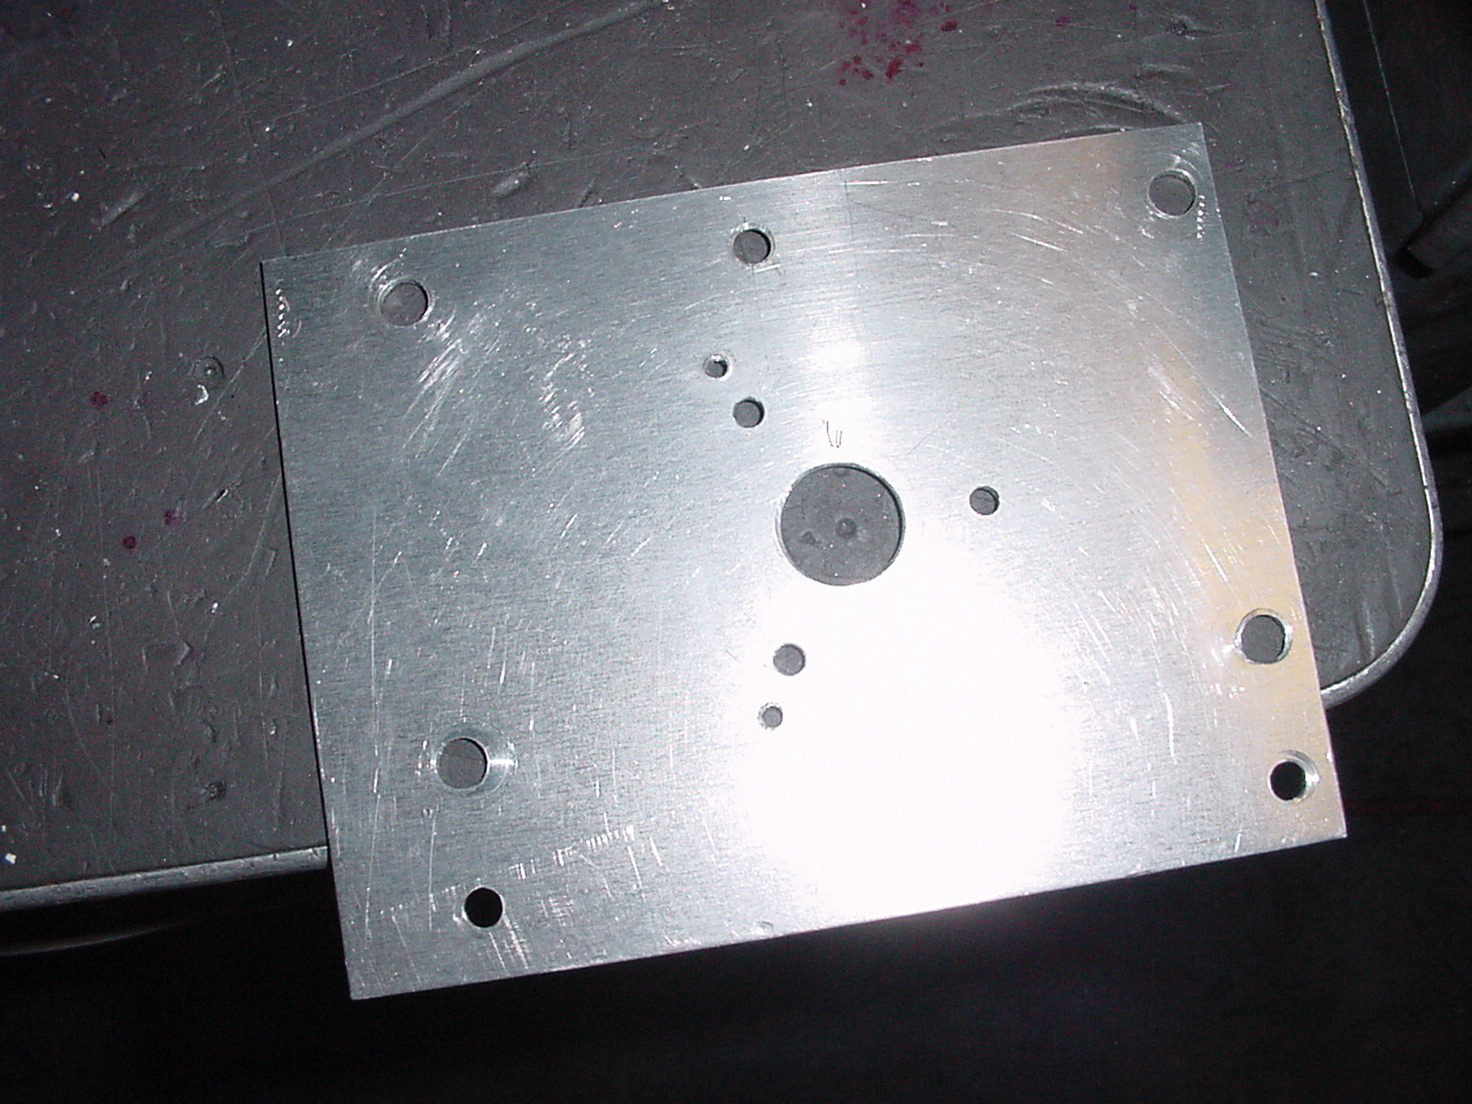
Modified plate for new motor
The Basement Arcade
New motor mounted with dual switch bar
The Basement Arcade
Ok, Next hurtle to Overcome! Its funny, trying to reverse engineer and interpret how the logic of the software in pinball machines are written. The Original unit uses 2 cams and 2 optos. Both opto are on when the building is full down and remain in that state till the building hits fully up where at that point one of the 2 optos is blocked. As the building sinks into the playfield, the second opto is blocked at the 10 o'clock position where the previously off opto turns back on at the 8 o'clock position. Both Optos are on again at fully down and the process repeats.
Trying to cheat fate I attempted to do single cam setup in hopes that the positioning was not as critical as I had hoped… BUZZZZZ….. Wrong answer!
Seems that 2 cams in unavoidable. This means that the originally chosen switches are too big and that they need to be moved. This means that the switch bar piece is wrong and needs to be remade and we need an additional cam, This also makes the spacing of the building wrong again as now there is more to fit behind the building so yet another slot needs to be milled for the building to move in. The Last picture shows that it all fits now with the exception that the switches are still too big and need to be moved.
My intent is to début this at the Pinball Wizards Convention in Allentown PA in less then 2 weeks so I'm running out of time….. An A hook up harness need to be constructed too!
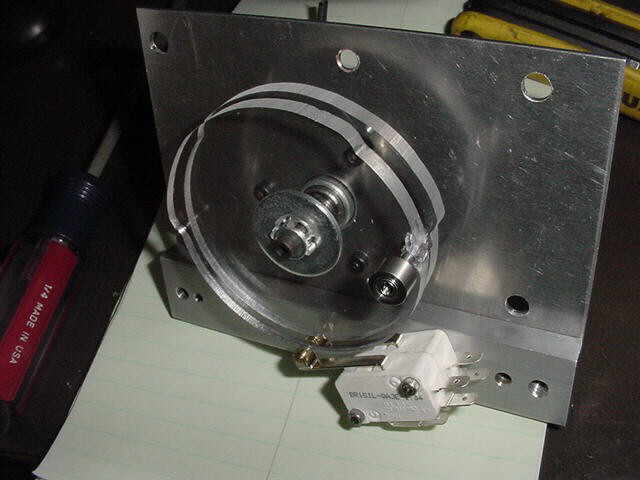
First failed cam set up
The Basement Arcade
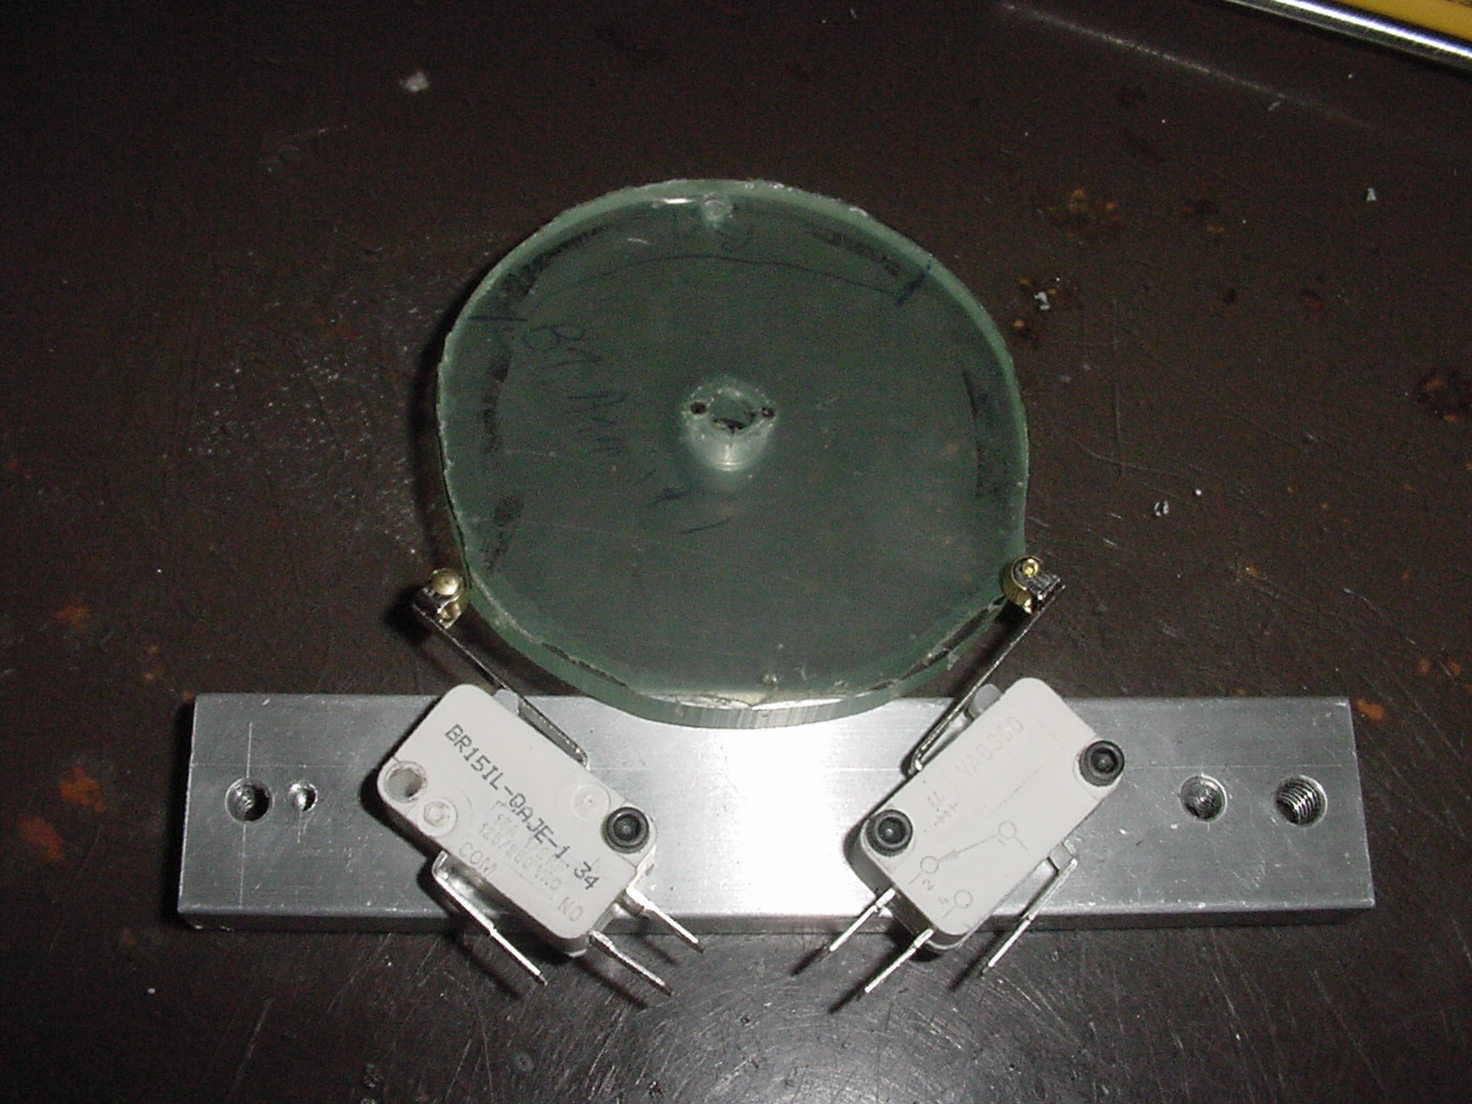
New cams mounted
The Basement Arcade
Assembled
The Basement Arcade
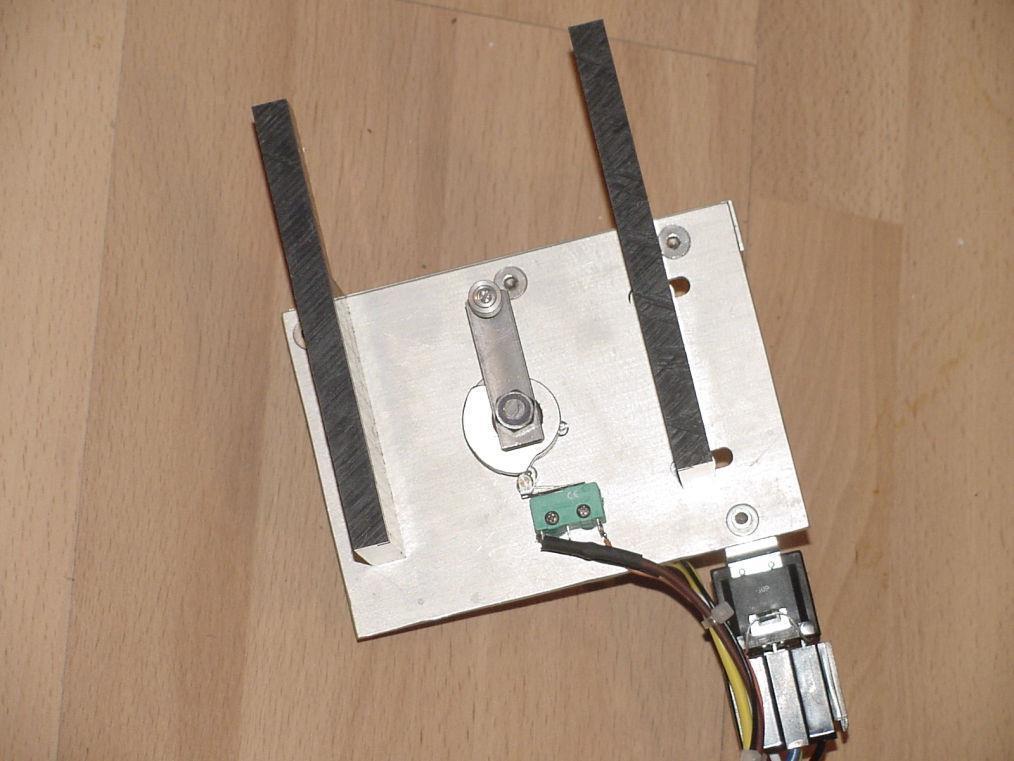
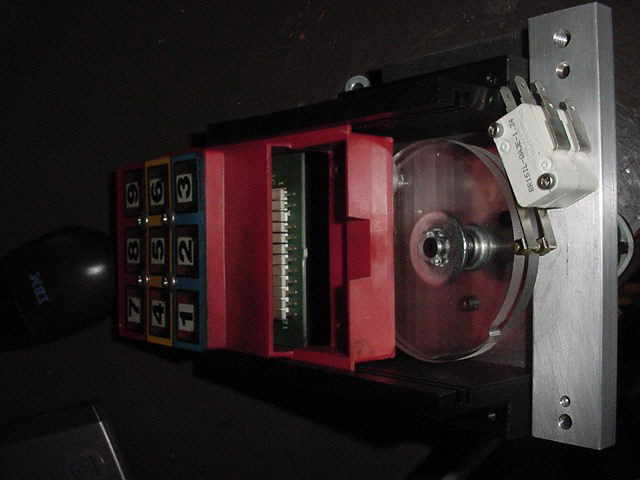
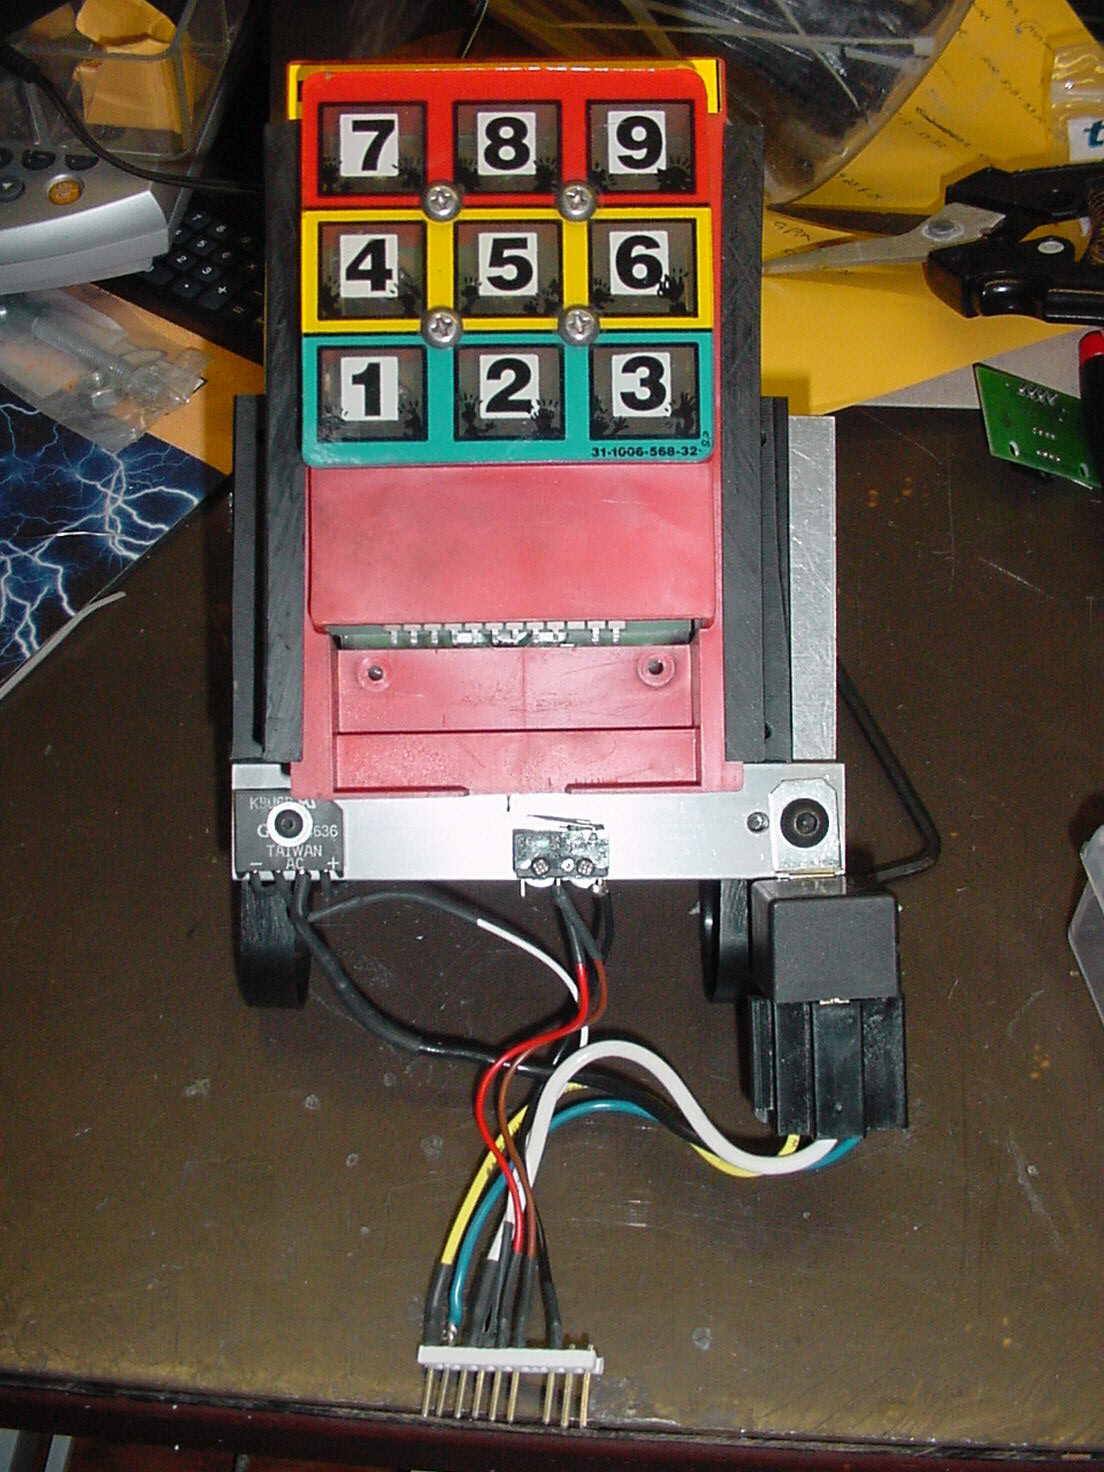
Success! After choosing smaller switches and remaking the mounting bar, this unit works! I made a harness for it too. The parts came in JUST in time to wire it up for the Pinball convention. The pictures below are close to what you get in the kit. Beta one will actually be more accurate to the end product as it wont have all the extra holes and slots as Alpha one. You can see some of the extra slots in this picture. The original unit uses a separate relay board, but our unit will be self-contained with the relay and rectifier to run the motor mounted on the switch bar. We have mounted it in on the playfield and it all fits. The only issue left is the motor speed. Although the original motor was 12 RPM and my motor is 12 RPM, my motor is running raster that the original prototype when you see them run side by side. The addition of a 100-ohm power resistor should slow it down to the correct speed… Off to Radio Shack
Final modifications
The Basement Arcade

Final modifications back side
The Basement Arcade
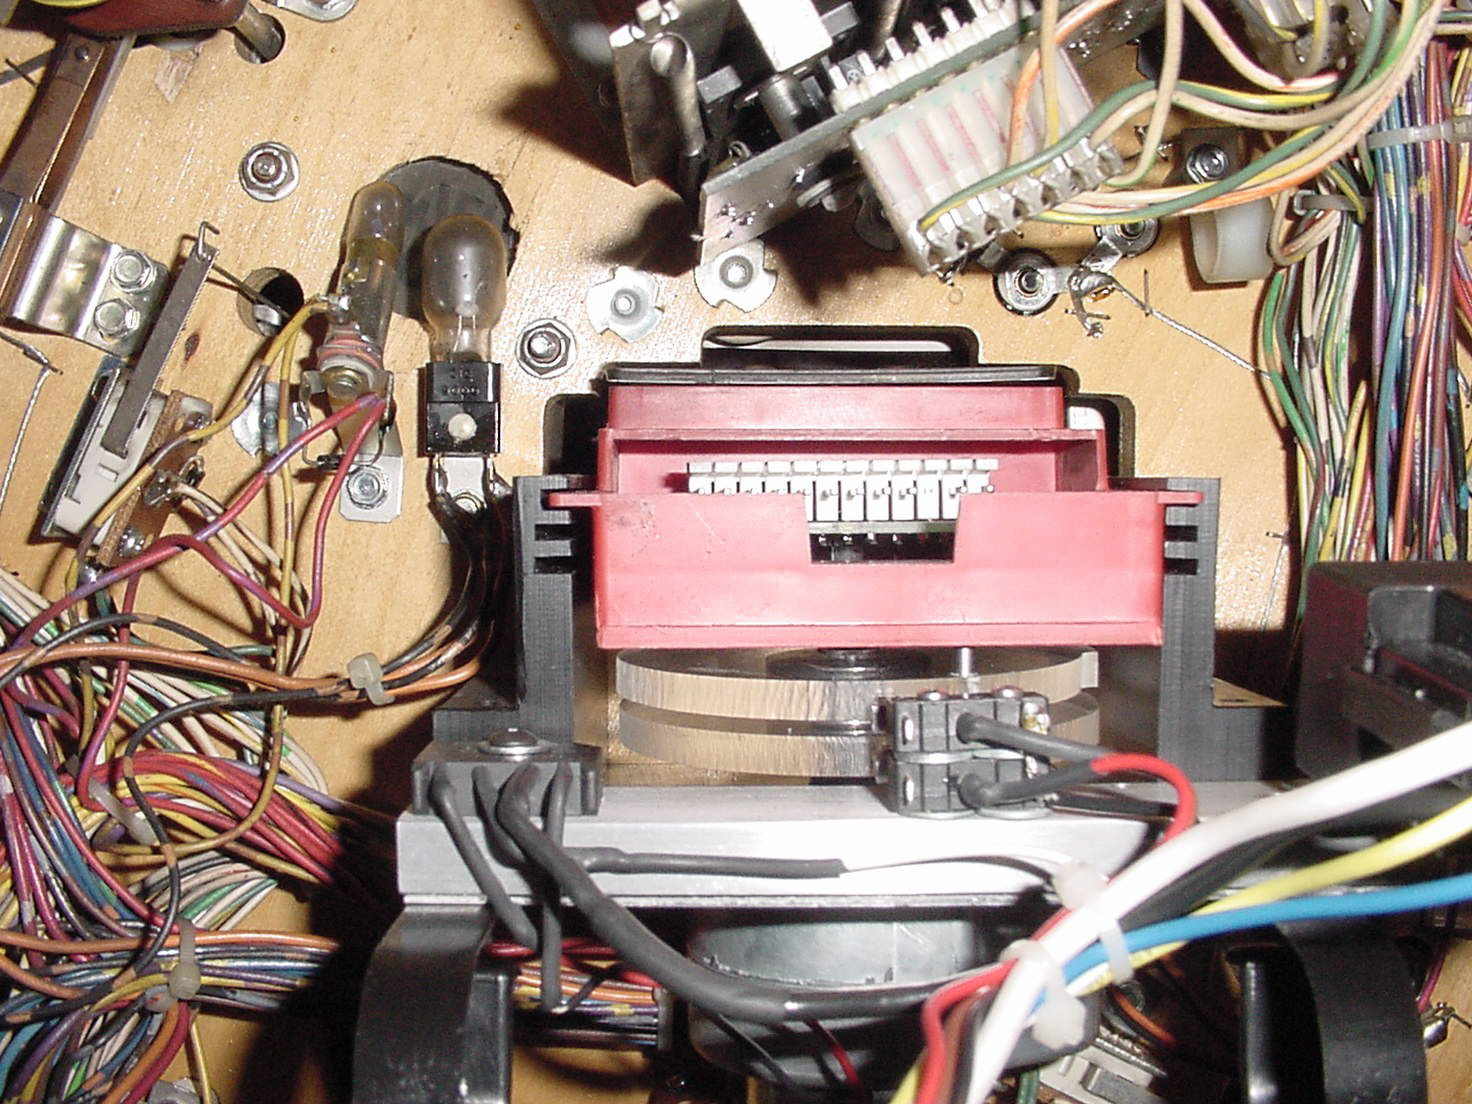
Cleaned up and mounted on the playfield
The Basement Arcade
Harness is plug and play - no soldering required
The Basement Arcade
Interface cable is made and plugged into the moving unit
The Basement Arcade
The speed issue was not too hard.. 100 ohm power resistor seems to do the trick! Check out the videos below. We also finished The Beta One unit, which, as stated before is the same unit without all the extra mistake holes and slots and is build of the CAD prints. This is also are back up unit if the Alpha prototype breaks at the Pinball convention. Next stop, Pinball wizards Convention for some Torture testing!
Side by side Earthshakers
My machine with my installed Earthshaker kit and a Williams prototype machine
Earthshaker close up one
Earthshaker close up two
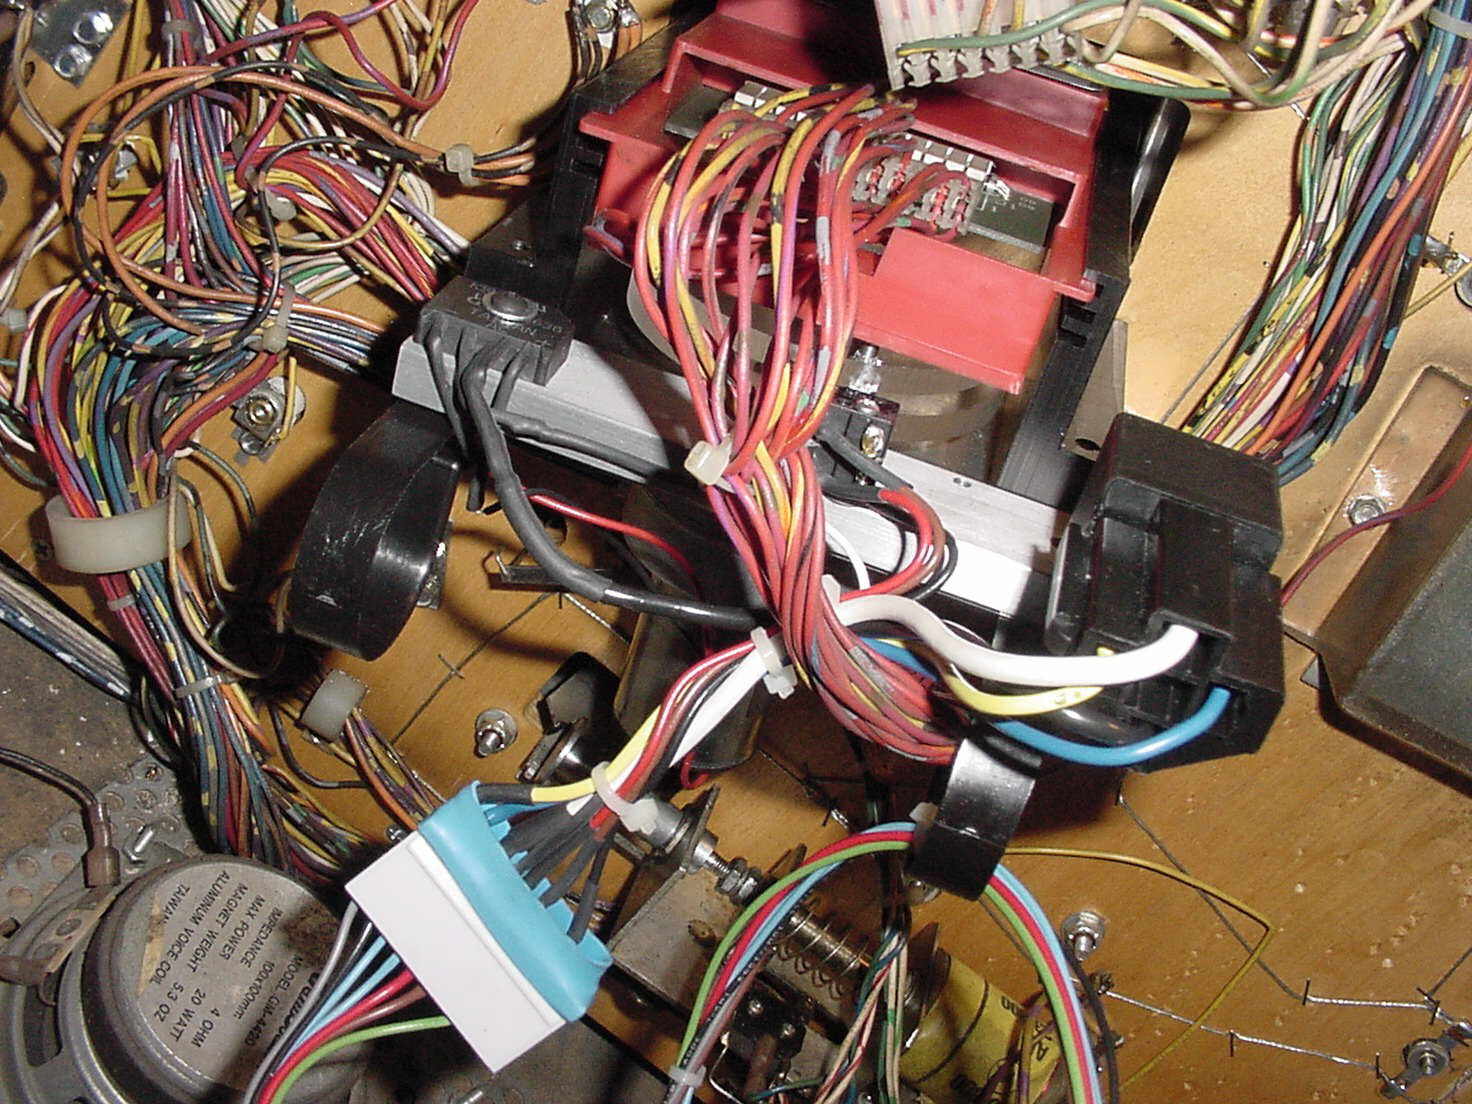
Earthshaker bottom view
As viewed from Under the playfield
Cams in action
Again, viewed from underneath
Earthshaker top view
Close up top down
Pinball Wizards Torture Test
Ran nonstop for 2.5 days :-)
With the first run behind us we turn out attention to run number 2. Trick here is to get these done a bit faster then the 2 years it took to make the first 10, so I have done some redesigning to streamline production and produce a better product.
You may notice that the count of many items it off target of the pending requests. This is due to availability of stock on hand and machine availability. Rest assure, that there will be one available for everyone that is on the waiting list with a few left over. As stated before, the next run will be to the count of 10, and then the final run will finish the pre order with a few to spare.
In order to make this a viable, and sellable project. We needed to redesign how it was made, taking automation, CNC technology, and better parts availability into play before taking orders for any more kits. This is the documented journey Of the second run including pictures of redesign parts with comments to thoes interested aond on the pre order list

New Design Steel Cams
The Basement Arcade
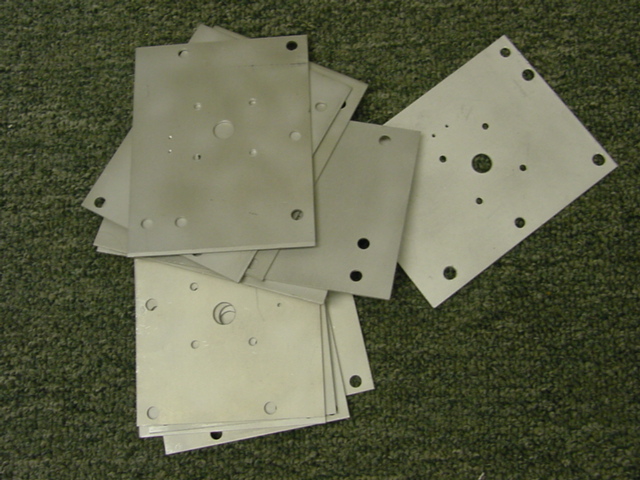
New Plates
The Basement Arcade
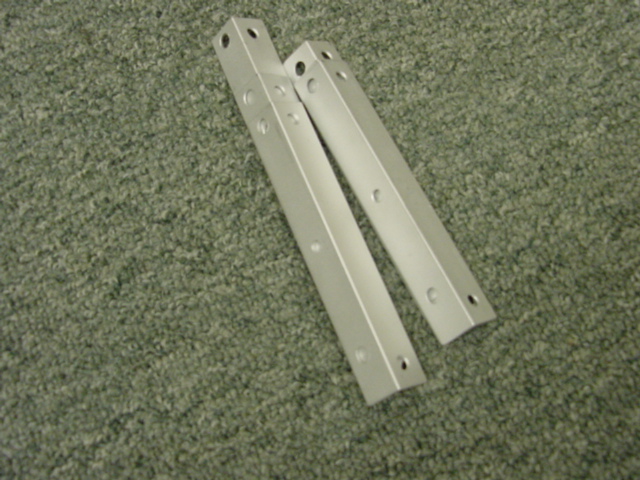
New mounts
The Basement Arcade
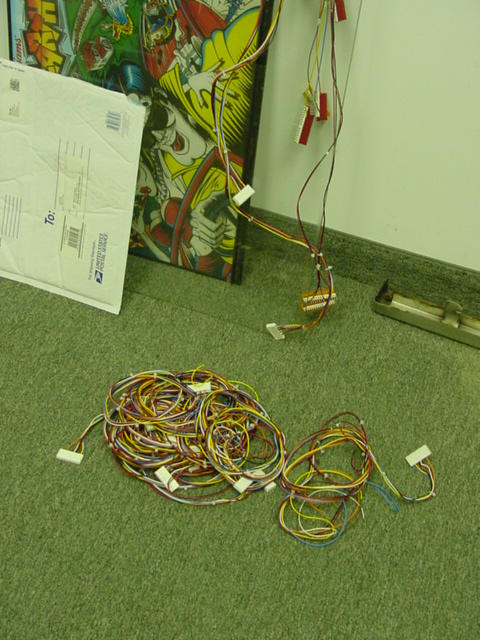
12 harnesses
The Basement Arcade
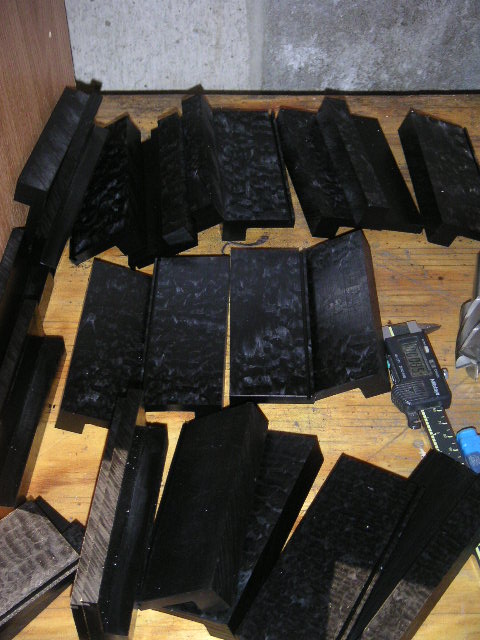
Pile of risers
The Basement Arcade
N1 G92 X0 Y0 Z0
N5 G90 F100.0 X-15.8480 Y-7.420
N10 G90 Z-4.200
N15 M03
N20 G1 F0.2 Y-9.250
N25 G90 F100.0 Z-2.200
N30 G00 F50.0 X-15.125 Y-7.420
N35 G00 F100.0 Z-4.200
N40 G1 F0.05 Y-9.000
N45 G00 F100.0 Z-2.200
N50 G00 F50.0 X-14.435 Y-7.420
N55 G00 F100.0 Z-3.000
N60 G1 F0.1 Y-9.000
N65 G00 F100.0 Z-2.200
N66 G00 Y-7.420
N67 G00 Z-3.500
N68 G1 F0.1 Y-9.000
N69 G00 Z-2.200
N70 G00 Y-7.480
N71 G00 Z-4.200
N72 G1 F0.1 Y-9.000
N73 G00 Z-2.200
N74 G00 F50.0 X-13.850 Y-7.420
N75 G00 F100.0 Z-4.200
N80 G1 F0.5 Y-9.000
N85 G00 F100.0 Z-2.200
N90 G00 F50.0 X-13.275 Y-7.420
N95 G00 F100.0 Z-4.200
N100 G1 F0.5 Y-9.000
N105 G00 F100.0 Z-2.200
N110 G00 F50.0 X-12.767 Y-7.420
N115 G00 F100.0 Z-4.200
N120 G1 F.05 Y-9.250
N125 G00 Z-0.1
N130 M05
N135 G90 F100.0 X-19.052 Y-8.400
N136 M03
N140 G90 F 50.0 Z-1.000
N145 G1 F 2.0 Z-2.000
N150 G90 F 50.0 Z-1.000
N155 G90 F100.0 X-16.552
N160 G1 F 2.0 Z-2.000
N165 G90 F 50.0 Z-1.000
N170 G90 F100.0 X-12.052
N175 G1 F 2.0 Z-2.000
N180 G90 F 50.0 Z-1.000
N185 G90 F100.0 X-9.582
N190 G1 F 2.0 Z-2.000
N195 G90 F 100.0 Z-1.000
N200 G00 Z0.1
N205 G91 G28 Z0
N210 G28 X0 Y0
N215 M05 M02
Step one. All blocks must be faced off before we do anything to them. Click the picture below to see the operation
Another CNC operation. This is actually the second procedure, and is the cutting of the block side.
The final cut in the Left and Right Risers and adds the mounting holes in them as well. Click the picture to see a Time laps movie of this process. The actual process takes over 80 minuets to mill this piece of the part